How-To Create the Perfect Cat Eye
Ah, the ever famous cat eye. If you’ve never tried to accomplish this look, we don’t blame you. At first glance, it can be a bit intimidating. Not only do you need to create a fine, precise line once, you also have to replicate it. But, we aren’t here to scare you off, we’re here to encourage you! This is a look you can recreate with ease- all it takes is a little practice and (thorough) step-by-step instructions from Glo Skin Beauty Senior Makeup Artist and Educator, Janeena Billera, to guide you along the way.
How-To
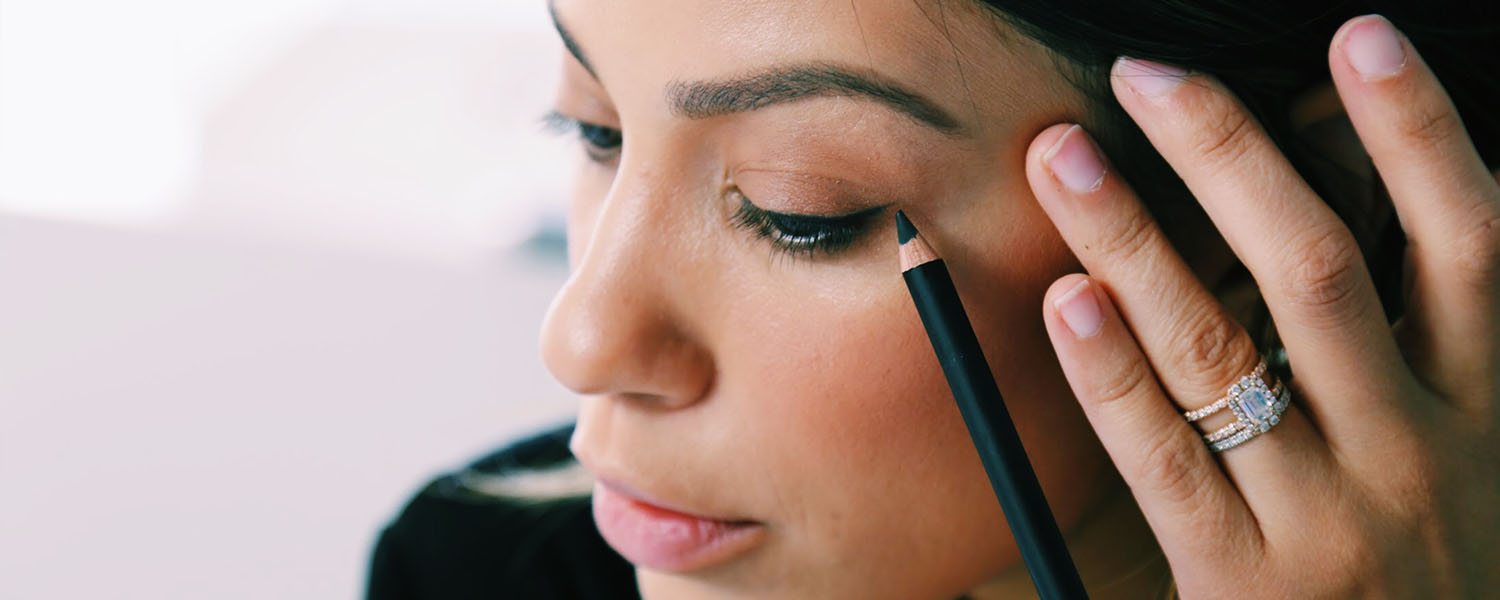
Using Precision Eye Pencil in Black or Dark Brown, begin ⅓ of the way on your lid and begin shading between lashes on lash line.
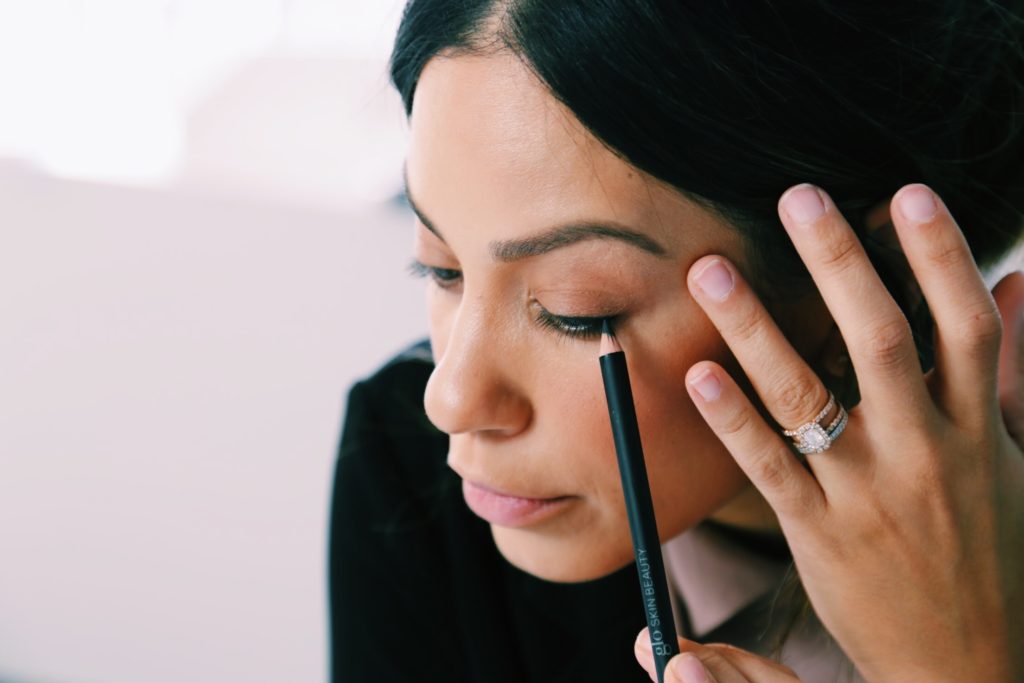 Once you reach the end of your lid, begin to raise the line and extend it to form your wing. Work in towards the eye, starting where you want the wing to end. Gradually begin to thicken the line to your desired intensity.
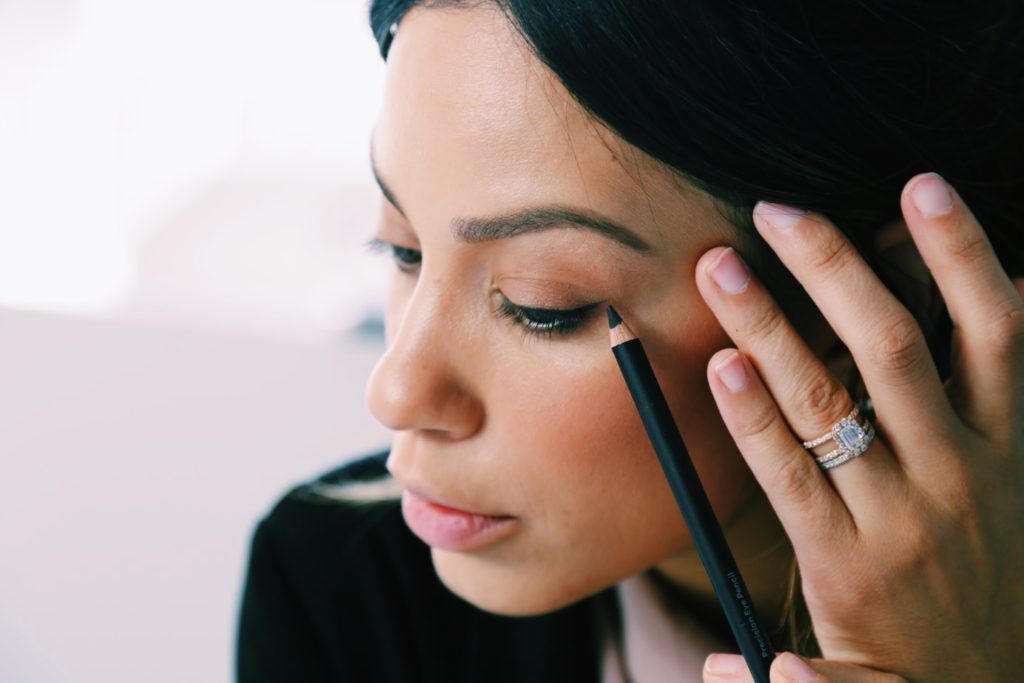 Continue shading towards the tear duct- as you move from the center of your eye towards your tear duct, the line should become thinner and blend seamlessly into your lash line.
 Continue to adjust your line for desired thickness and perfect with Precision Eye Pencil’s blending point.
 Now is a great place to stop if you’re happy with your results! If you want to add a bit more drama and staying power to your look, continue with Liquid Ink.
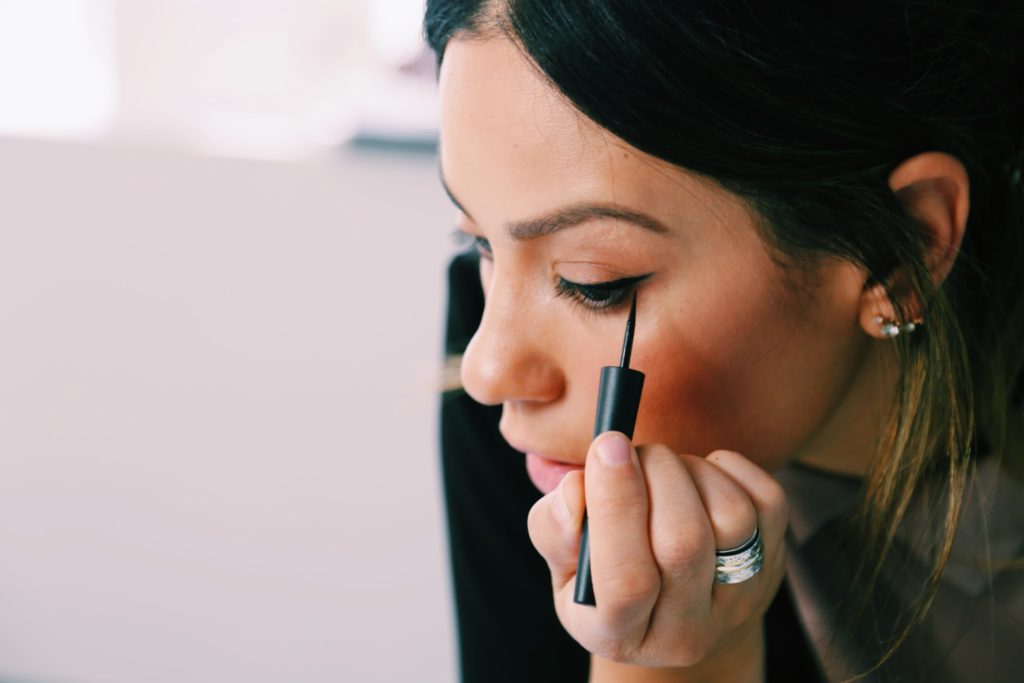
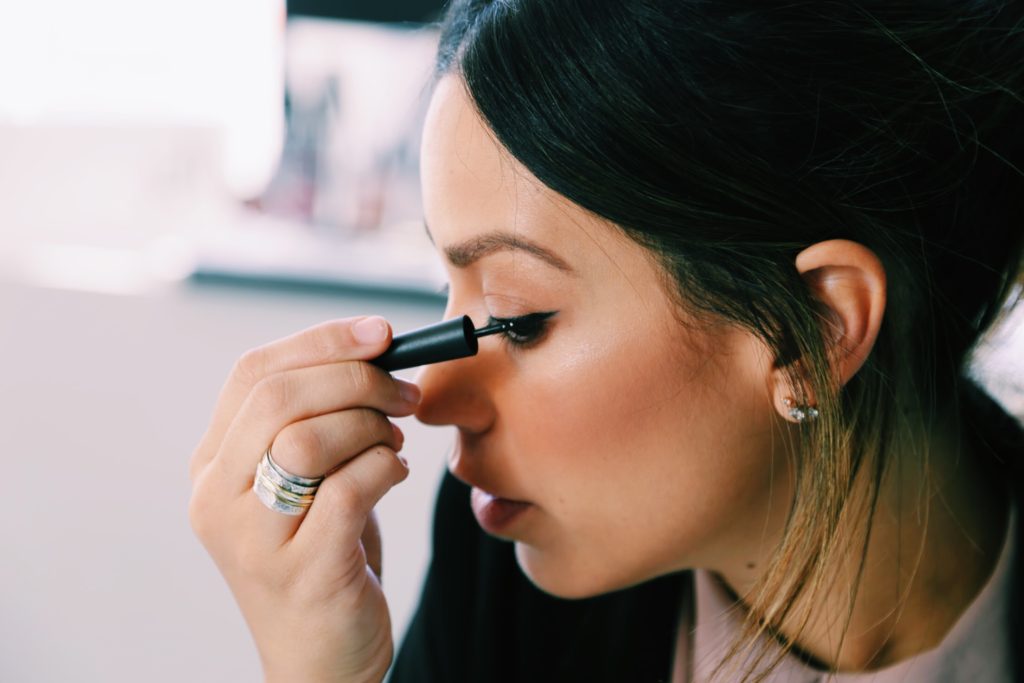
 Apply Liquid Ink to the lash line using minimal pressure to achieve a thin line. It’s much easier to add thickness than remove it. Remember to work on one section of the eye at a time and be sure to use small strokes instead of one continuous line.
 To add depth, flip the felt tip around and start halfway into the wing and bring the line in towards your eye.
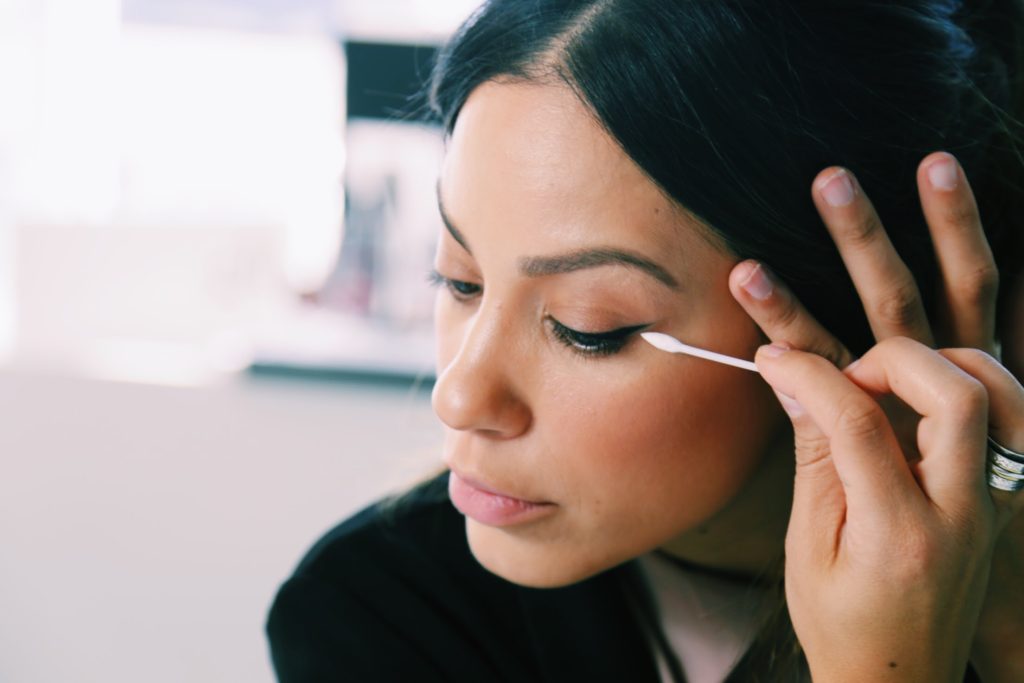
 Grab your pointed q-tip and clean up any messes.
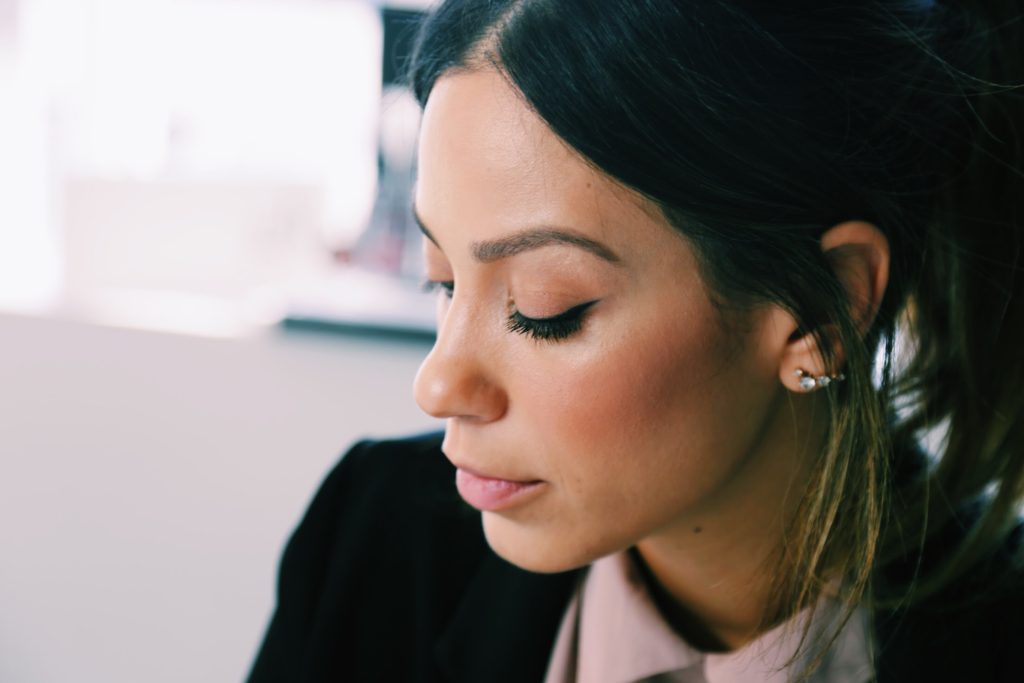
 Take a moment to admire your successful cat eye! That wasn't so hard was it?
 We want to see your version of a cat eye! Be sure to tag us on Instagram using @gloskinbeauty and #discoveryourglo for a chance to be featured.